We're thinking about knocking a few walls down in our lounge and I wanted to visualise how it would look. Since it's gonna cost us about £6,000 for the work and materials, I figured I should try more than just imagination.
So... how to do it? My mind immediately thought of the Free Google Sketchup, as I've heard people say it's the simplest tool for producing models of stuff. I don't have any modelling experience, so this was a brave experiment.
Here's the process I went through, it took me about 4 hours to create this whilst also getting used to Sketchup and various basic modelling concepts.
I produced the model whilst sat on the couch staring at the room I was modelling, which probably made it easier. Georgina also was running around the room with a tape-measure shouting out measurements when needed!
NOTE: All images are up on Flickr
Grab a floorplan, start tracing
I grabbed the original house brochure PDF from the estate agents. It had the house floorplans with rough layout. You can capture a bit of the plan and paste it into Sketchup. I then started tracing around the walls using the line tool.
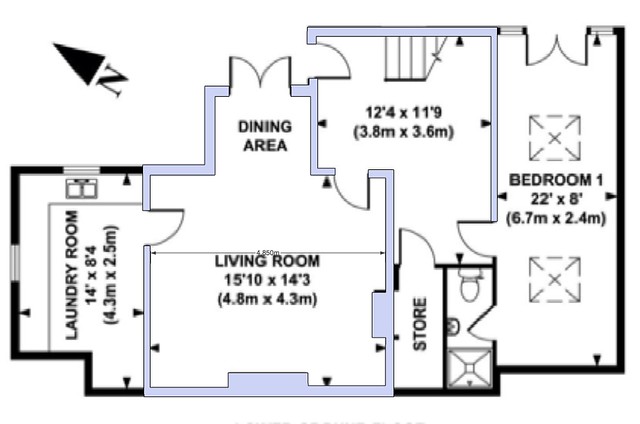
Tracing around the walls copied from a PDF. The blue bits are the bits I've drawn over.

Sketchup lets you orbit the view to see in different angles
Drag up the walls

You can use the Push/Pull tool to start dragging up the walls you traced.
Basic Render
Sketchup doesn't render realistic images by default, so I did a bit of searching around for a Sketchup Renderer. Podium seemed to offer the path of least resistance. Since I don't know what I'm doing, I figured I didn't want to spend hours learning about various rendering tactics.

Podium rendering the walls. Wow!
Remove Walls
The purpose of me dicking about with Sketchup was to see what the lounge would be like without the walls. So, I took em out! I also couldn't help drag a few new components in from the Google 3D Warehouse.

Walls, be gone
Adding some stuffs
Once you've got the walls right, it's pretty easy to drag components in from the Google 3D Warehouse. You can also position the camera wherever you want for a nice shot.

Adding in a table, doors and stuff.
Playing with lighting, and adding even more stuff
To try and simulate our new lounge, I wanted to add more things. Podium has some cool lighting effects too, so I chucked lots of lamps in.

Lights and more stuff

Tried a different floor texture


Summary & Tips
This was a fun experiment, and it's amazing you can grab Google Sketchup and Podium and produce something actually useful without having any experience.
In the 4 hours I spent on this, probably about 1 hour was spent learning. Watching the first 4 Google Sketchup videos was really useful to get the basics of what the tool is about.
I also scanned the Podium manual at one point, when the lights stopped working!
Discovering Scenes was really useful. Scenes basically saved camera angles. You can create several and jump between them really quickly.
I must admit, to take this further I feel like I need to re-create the model from scratch. It's got into a bit of a mess. I'd probably advise reading a book about Sketchup, and watching as many online videos as possible.
There are loads of good resources. For example, this blog explains how to organise your model when it gets bigger. You'll also find videos of people like this dude who had a whole shop of people producing massive models for a living. Very cool.
NOTE: All images are up on Flickr
UPDATE - A few more shots with more fireplace detail

